Posts

Showing posts from 2009

Oaking on New Year's Eve

Image
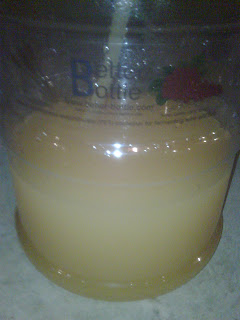
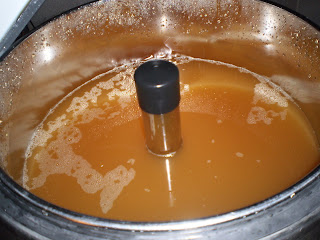
A little over a month into the secondary fermentation phase and the wine continues to dry down. The great reaction from last year's oaked Riesling bottles has encouraged me to add oak to two of the three carboys this year. I must say that I cannot even taste the oak from the chips, but I can recognize what seems to be an increased fullness in the wine. The faint bitterness from the oak perhaps adds an element that complements the sweetness and acidity of the wine and fills out the palate.

Going Four Weeks in the Winepod?

I checked on the Riesling this past Sunday, three weeks after start of fermentation. The Winepod read a Brix of 8 and my hydrometer read close to 9. Last year, the Riesling was close to zero after three weeks. The difference could be a tighter control on temperature, since I set the targets further apart this time to prevent overshoot by the heater and cooler. The temperature has been a near steady 62 degrees from the start, whereas it drifted briefly up to 65 last year. The difference could be a slight increase in available sugar, but this is unlikely, because the starting Brix was within a degree or two of last years' starting point. The difference could be a higher level of SO2. I did not measure the amount of SO2 added by the vineyard, but I have no reason to suspect a spike this year. The difference could be the potassium bicarbonate added to reduce a higher starting acid in the grapes or the difference could be the higher acid itself. Whatever the reason, I decid

Cider and Riesling Year Two

Image
On October 23-24, Alicia and I made a trip back to the vineyard at Keuka Lake to pick up this year's Riesling grape juice. We brought Maya along, our little Cairn terrier. It was raining most of the trip. The Finger Lakes received much less sun in the summer of 2009 as compared to 2008. The result is a lower available sugar content in the grapes and ridiculously high acidity. Tom, the owner of the vineyard treated the juice with potassium bicarbonate to drop the acid a little. He measured a starting Brix of 19.4 and a total acidity of 1.036. I purchased five pounds of dextrose to make up the sugar shortfall. When I later measured starting Brix after loading my juice into the Winepod , I came up with 20.4 -- somewhat better. Perhaps Tom took his measurement before the entire crop was crushed. Adding the 5 pounds of dextrose gave me a theoretical fermentation starting Brix of 23, although I could not take an exact measurement at the time with the sugar still dissolving in the ta

Fermented Dry In Two Weeks

Image
I apologize for the blurry picture from my Blackberry. After two weeks, the cider looks like orange juice. It may not be pretty at this point, but I was pleasantly surprised by the taste. I will let the yeast clear in the carboys before bottling. As an experiment, I added cinnamon to one carboy and Polyclar to another. The third carboy I left as is.

Hard Cider Rules

Image
With fall in Ulster County, the apples are hard to miss. Alicia and I made a trip to Dressel Farms, a pick-your-own apple farm in New Paltz. I purchased 15 gallons of freshly pressed cider. After letting the cider warm to about 60 degrees, I loaded it into the WinePod. I set the temperature to 71 degrees and added yeast, yeast nutrient, acid blend, pectin enzyme, and potassium metabisulfate. If this works, I'll bottle the cider in 12 oz beer bottles. The Finger Lakes Riesling harvest is October 24. Hopefully the cider will be in carboys or bottles by that time.

“Suds on the Roof”

Image
The weather was near perfect here in New York. We took the bottles of the freshly brewed beer and some Shier Riesling up to the roof of my apartment. ...We sat and drank with the sun on our shoulders and felt like free men. -Red

One Year of Motion Camera Action

While the beer finishes and before I start the hard cider, I put together another short film. June 2008 to July 2009 in 12 minutes. The motion camera takes a photo at the slightest movement. When put together, the pictures create a time lapse film. The motion trigger creates odd intervals from sunlight, lightning, raindrops, snowflakes, wind blown leaves, the animals, and us. One rainy day might last a minute or more, but daily visits from Mr. Squirrel might appear as 1/30th of a second, and months can pass in 30 seconds. I even mixed a sound track for this one.

Beer Bottling

Image
I managed to get 45 bottles out of the not quite full 5 gallon carboy. Two bottles were lost to my taste testing both at one week and two weeks of fermentation. It was much better the second week, but I can't recommend drinking flat room temperature beer. Therefore the beer must be mixed with a small corn dextrose syrup solution (0.75 cups dextrose to 1.5 cups water). By racking the beer onto the corn syrup solution, the beer is charged and ready to ferment a bit more in the bottles. The remaining yeast eats the sugar to produce the carbon dioxide bubbles during the next two weeks down in the basement. Final step is to refrigerate for cold beer. Soaking the bottles in an oxygen cleaning agent. Placing them on the dishwasher rack to dry. Filling the bottles with the corn syrup charged beer. Clamping on the bottle caps. Boxing the bottles.

Beer Timeout

Image
With 100% positive feedback (from around 20 people) on the inaugural wine production, I've ordered the next batch of Riesling grapes for the fall. Tentatively, the harvest is set for October 24th. In the coming weeks I will set up a New York Limited Liability Company and begin the process to obtain both a farm winery and wine store license. In the meantime, I decided to try my hand at beermaking. I ordered the malt and hops from Fallbright. I received a hopped malt concentrate and brewer's yeast packet from an Australian company called Coopers. The resulting beer should be an ale. I used Munton's light dried malt extract from the UK as a fermentable sugar. I mixed up the ingredients with 2 liters of boiling water in a large pot. I siphoned the boiled mixture into a carboy and added another 15-16 liters of water. Fermentation underway, with foam pouring out of the airlock. Fermentation takes place at 72 degrees F. Good thing this is happening in the basement. I ordered 48 -

Oak Riesling Bottled - End of Provina?

Image
The finished Oaked Riesling bottles. Adding the shrinkwrap cap over the cork by dipping the bottle in boiling water. Driving the cork into the filled bottle. Allowing the wine to flow down into a bottle. Connecting a bottle to the spring-loaded wine supply line. The pictures show the story of the 25 bottles of Oaked Riesling. Thanks to Alicia for her photojournalism. I think the acid is still a bit high on this batch, but I imagine the wine will only get better with chilling and age. I only used half the Polyclar this time, but still managed to get a fairly good pale gold color. I think the slightly darker hue goes with the added oak chip flavoring. I received sad news from Greg Snell, CEO of ProVina and the Silicon Valley inventor of the WinePod. With all of the venture capital gone dry, ProVina hit a wall. Greg had to lay off all of his employees and suspend all operations. There will no longer be any support for the WinePod. It disappoints me that when someone steps up and devel

Filtering and Bottling - End of the Line?

Image
Six months since the grapes were picked. Today the wine is bottled. I am thrilled that the taste and color have met my expectations. Very satisfying to get this far. Loading the filters into the pump assembly. Connecting the tubes to the chilled and unfiltered wine. Running the pump and filtering the wine. The finished wine in blue bottles with labels. Nice! The bottles in a case. Carboy 1 is history. We bottled the wine after coarse grain filtering using a Buon Vino motorized pump and filter. The result was 25 bottles and 1/2 half bottle. I used the half bottle to top off carboy 3. I labeled the other 25 bottles and placed them in cases. 50 more bottles to go (including the Oak Riesling) and then no more winemaking until the fall. In the meantime, I am planning a lot of hard cider and maybe an experimental beer.

My Sample Labels

Image
The designs above will be tested on the first run of bottles.

Fixing Acid Levels on the Remaining Carboys

Image
Tartaric crystals added to a small wine sample. Pouring in the tartaric doped sample. The acid fizzes as it hits the wine. Ice packed around the carboy for maximum coldness. To the fridge for cool down. Looking vibrant, but needs Polyclar treatment to get that pale golden color.

A Taste Test First

Today we opened the test bottle pictured below during the IP lunch meeting at work. About 7-8 people sampled the wine. The reviews were good. Not only were the tasters a bit shocked that the wine did not suck, but I was a bit surprised since the test bottle came directly from the bottom of the carboy from the last racking. It was loaded with excess tartaric, with large crystals clearly visible in the bottle. The wine is young, but the flavor is there. I think it is just a matter of aging, mellowing and dialing the color back a bit from orange to yellow.

Lightning Strikes Wine!

Image
Actually, the lightning came after my success with the acid reduction. I followed the advice of Tom Mitchell and added tartaric acid to one carboy, bringing the pH from 3.4 down to 3.2. Then I packed the carboy in garbage bags with ice and loaded the bags and carboy into the fridge. One week later I racked the wine off beautiful crispy glacier-like tartaric crystals. The taste is vastly improved, with a mild bite, but no grapefruit aftertaste. Aging will help, but I didn't even need a TA acid test to know that the wine is now remakably close to bottling condition. In fact, after racking off the crystals, I decided to bottle the leftover wine from the bottom of the barrel for some pre-bottling feedback at work. The only finishing touch from here, besides aging in bottles, will be to try to get the color right. For that, I plan to use a clarifier PVPP known as Polyclar. Polyclar removes haze causing polyphenols as well as yeast cells, which give the wine an orange glow tint. I'm

Free Advice

I spoke with Tom Mitchell , the owner of Fall Bright vineyard, where I purchased the Riesling juice. Turns out that Tom purchased a portion of the 2008 Riesling grapes from another vineyard in the area, which he said was not his usual practice (now he tells me). He said that others who purchased the Riesling had experienced similar issues with acid, but mostly found the color to be too dark for their taste. He said he was conducting test to see about acheiving the proper color. I gave Tom an explanation of my starting and ending TA and pH numbers and the steps I had taken thus far. His recommendation was unique. He explained that I was likely not getting enough of a reduction from my cold stabilization because the pH was too high. He recommended lowering the pH to 3.2 by actually adding more tartaric acid to the wine. He said that when I place the carboy back in freezing conditions for one week, the acid will drop. I will give it a try. Since it is too late in the season to stabilize

Taste and Color - So close, but so far away.......

Image
I have entered mad scientist mode. After fining with a combination of Kieselsol and Chitosan and cold stabilization in the garage for two weeks, the wine tastes too tart. The initial touch to the mouth is sharp, which I kind of like, but the aftertaste is like grapefruit juice. Yeccchh . It seems clear from the taste that high acidity is the culprit. To be sure, I went out and ordered an acid test kit and a fancy electronic pH meter. The pH meter was pricey at $45. I calibrated the meter using 4.00 and 7.01 pH buffered solutions. All three carboys read a pH of 3.4. Pretty good for a white wine. Now for the real test. The test kit included sodium hydroxide and phenolphthalein with a test tube and syringe. To determine Total Acidity (TA), the wine is placed in the test tube with a few drops of phenolphthalein . Sodium hydroxide ( NaOH ) is added one drop at a time with the syringe until the wine turns pink. I performed the test twice. First time it took 4 cc of NaOH and the second t

Cold Stabilization

Image
I racked the oaked wine carboy on February 8th and racked the non-oak on February 15th. After each racking, I added 2 teaspoons of potassium sorbate to the carboys and stirred them up. That should put a stop to any residual fermentation. I filled the airlocks with 100 proof Smirnoff Vodka. Next I placed the carboys in the ice cold garage for the two week cold stabilization period at 10-30 degrees F. After two weeks the carboys will be racked and ready for the fining process. Bottling will be in the first two weeks of March.

Drying and Clearing

While the wine continues to dry and clear, all I can do is wait. To kill time, I am attaching a security-cam time lapse video. The camera takes a picture whenever there is any motion. I combined a series of pictures to make a short film. A few animals star in the film, if you watch carefully.

Oaked and Racked

Image
The above picture shows carboy 3 with oak chips added on December 20, 2008. The oak remained in the carboy for 12 days. After the new year, I racked the wine to clean carboys and tossed the old oak chips. After racking, I tested a glass of wine from carboy 2. The wine is definitely improved from my last tasting. It is starting to clear up, but the carbonation from the yeast is still strong. It was like drinking champagne. Unfortunately racking involves losing a small volume of wine from each carboy. The loss results from the sludge at the bottom of the carboy. All of the dead yeast makes it impossible to rack the last bit of wine from the bottom if I want to avoid sucking the sludge into the clean carboy. I topped off each carboy with a bottle of commercial dry Riesling from Anthony Road Winery (to keep consistency with Finger Lakes grapes). I managed to get the Titrets SO2 test kit to work. Well, sort of. I find it nearly impossible to suck individual drops of wine into t